WeShop Merchant Guide
How to Register as a Merchant
Becoming a merchant allows you to sell your products on the WeShop platform. The process involves two main stages: an initial sign-up and then completing your detailed business profile.
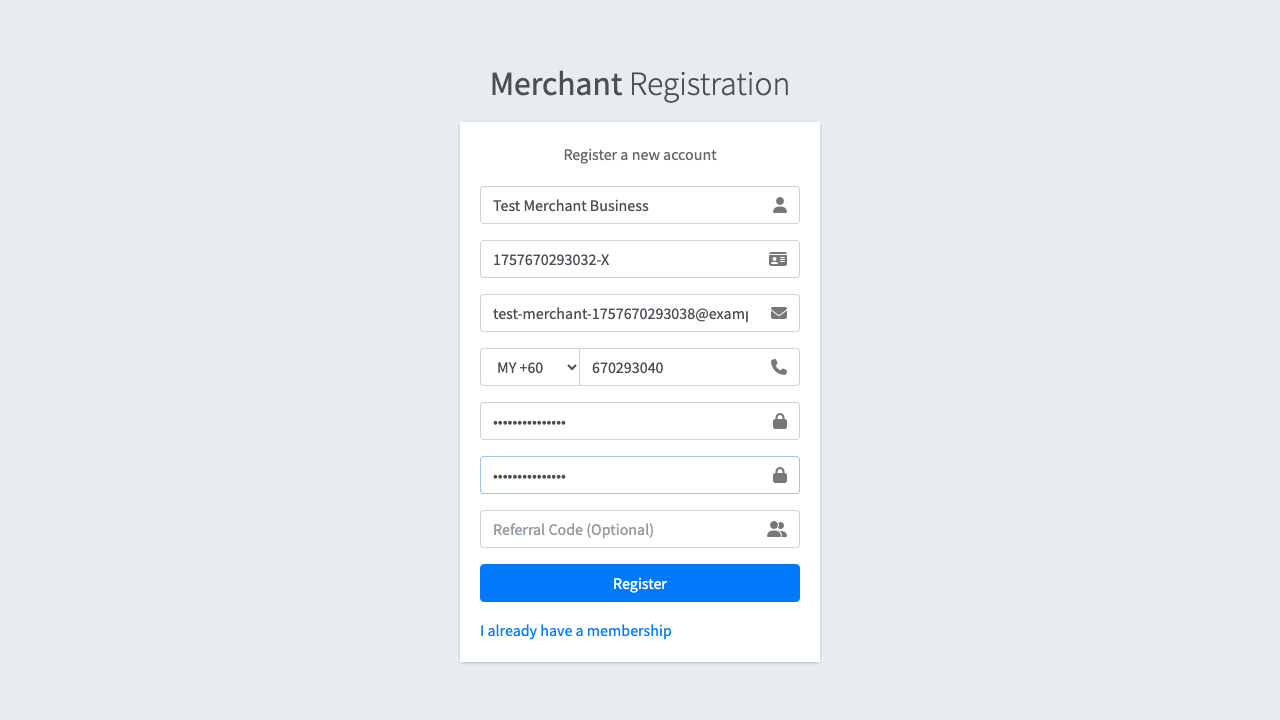
Part 1: Initial Sign-up
This first step creates your basic merchant account.
Step-by-step guide:
- Navigate to the Merchant Registration Page: Find and go to the specific page for merchant sign-up.
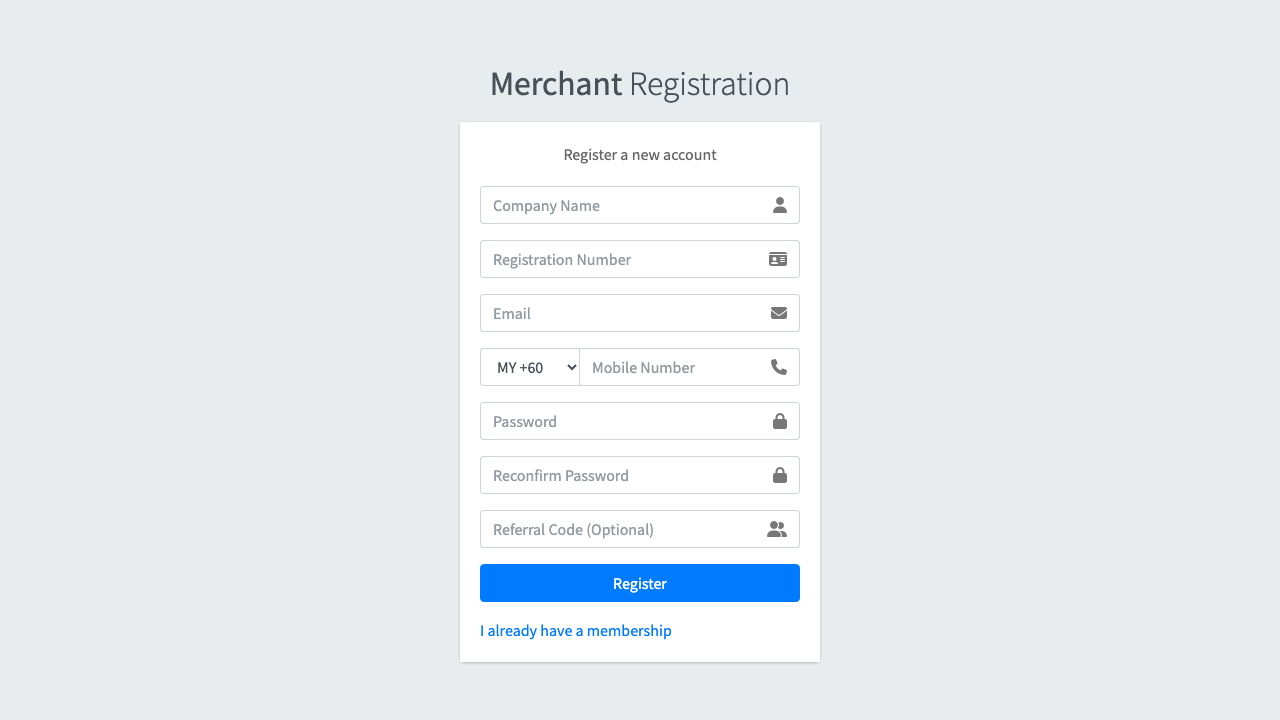
- Enter Your Initial Details:
- Full Name / Company Name: Enter the name of your business.
- Business Registration Number: Provide your official business registration number.
- Email: Use the primary email address for your business.
- Mobile Number: Enter a contact number for your business.
- Password: Create a password for your merchant account.

- Submit the Form: Click the registration button to create your account.
After initial sign-up:
- You will receive a welcome email confirming that your account has been created. This email will contain a link to the merchant login page and your login details.
- Your account is now created but is in a pending state. You must log in to complete the next part of the process.
Part 2: Completing Your Profile
After your initial sign-up, you must provide more detailed information to get your merchant account approved.
Step-by-step guide:
- Log In to the Merchant Dashboard: Use the credentials from your welcome email to log in.
- Navigate to the "Complete Profile" Section: Once logged in, you will be prompted to complete your profile.
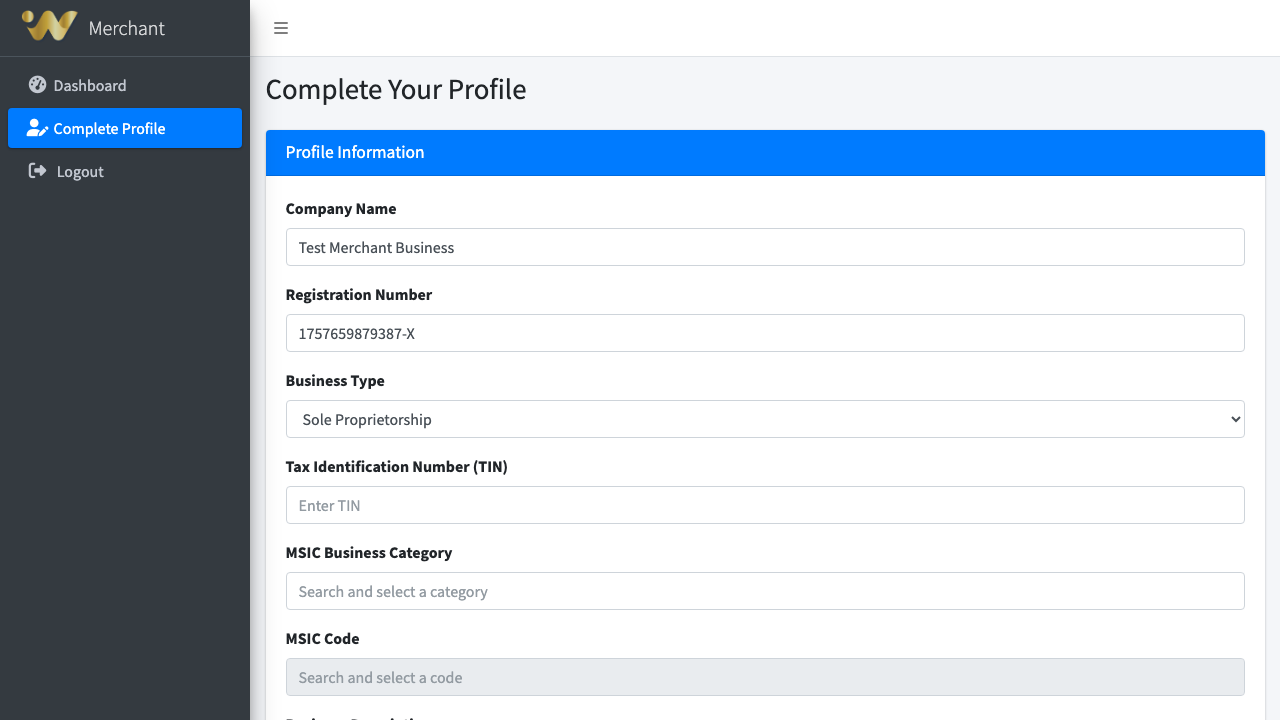
- Provide Detailed Information: Fill out all the required forms, which will include:
- Business Details: This section captures the core information about your company.
- Company Name: Your full business name.
- Registration Number: Your official business registration number (e.g., SSM).
- Business Type: Select from the dropdown (e.g., Sole Proprietorship).
- TIN: Your company's Tax Identification Number.
- Business Description: A brief summary of what your business does.
- Website: Your company's official website (optional).
- How to Select Your Business Category (MSIC Code):
Our platform uses the standard MSIC (Malaysia Standard Industrial Classification) codes. This is a two-step process:
- Select a Business Category: Click into the "MSIC Business Category" field. A searchable dropdown list of broad categories will appear (e.g., "MANUFACTURING", "ACCOMMODATION"). Click on the category that best fits your business.
- Select a Specific MSIC Code: Once you've selected a category, the "MSIC Code" field becomes active. Click into it, and a new dropdown will show specific business types. Find and click on the precise code that describes your business. (e.g., "55101 - Hotels and resort hotels").
- Business Address: The physical address of your company.
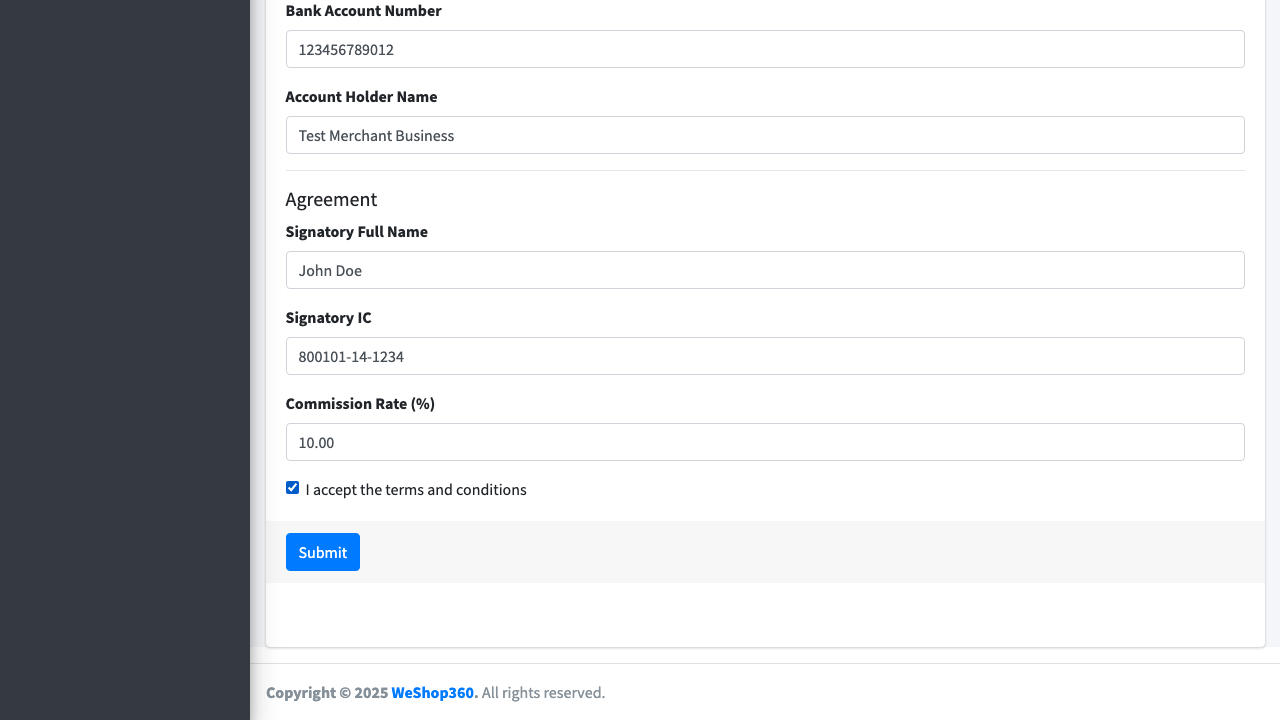
- Bank Account Details: The bank account where you will receive payments.
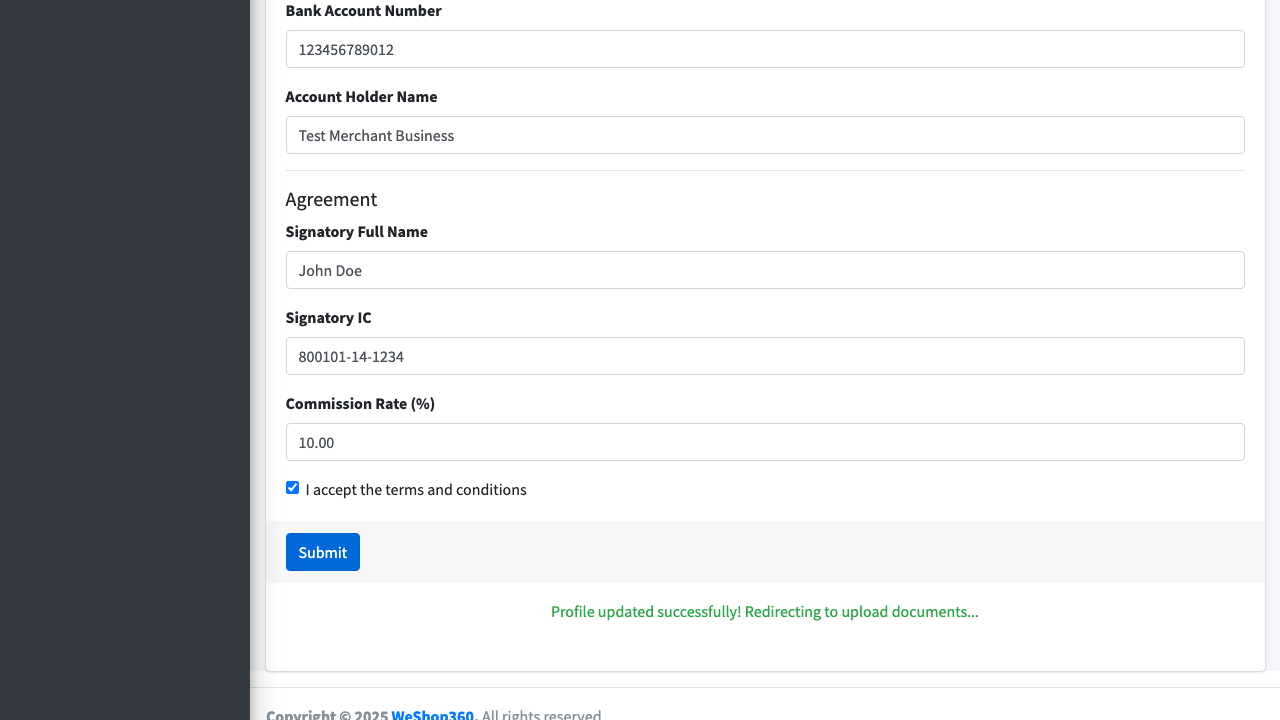
- Signatory Information: The details of the person authorized to sign on behalf of the business.
- Signatory Full Name: The full name of the authorized person.
- Signatory IC: The IC number of the authorized person.
- Business Details: This section captures the core information about your company.
- Accept the Agreement: You must review and accept the merchant terms and conditions.
- Submit for Approval: Once all information is filled out, submit your profile for review.
After completing your profile:
- Your application status will be updated to "Pending Approval" and "Pending Documents".
- The next step is to upload the required legal and business documents for verification by our team. This process is handled in a separate section of the merchant dashboard.
Part 3: Uploading Your Documents
After completing your profile, the final step before your application can be reviewed is to upload the required business documents.
Step-by-step guide:
- Go to the "Upload Documents" Page: In your merchant dashboard, find and navigate to the page for uploading documents.

- Check for Required Documents: At the top of the page, you will see an alert box listing all the documents that are required for your specific business type.
- Select a Document to Upload:
- In the "Document Type" dropdown menu, select the type of document you are about to upload (e.g., "Business Registration SSM", "Bank Statement"). The dropdown will only show the documents you still need to provide.
- Click the "Choose file" button to open your computer's file browser.
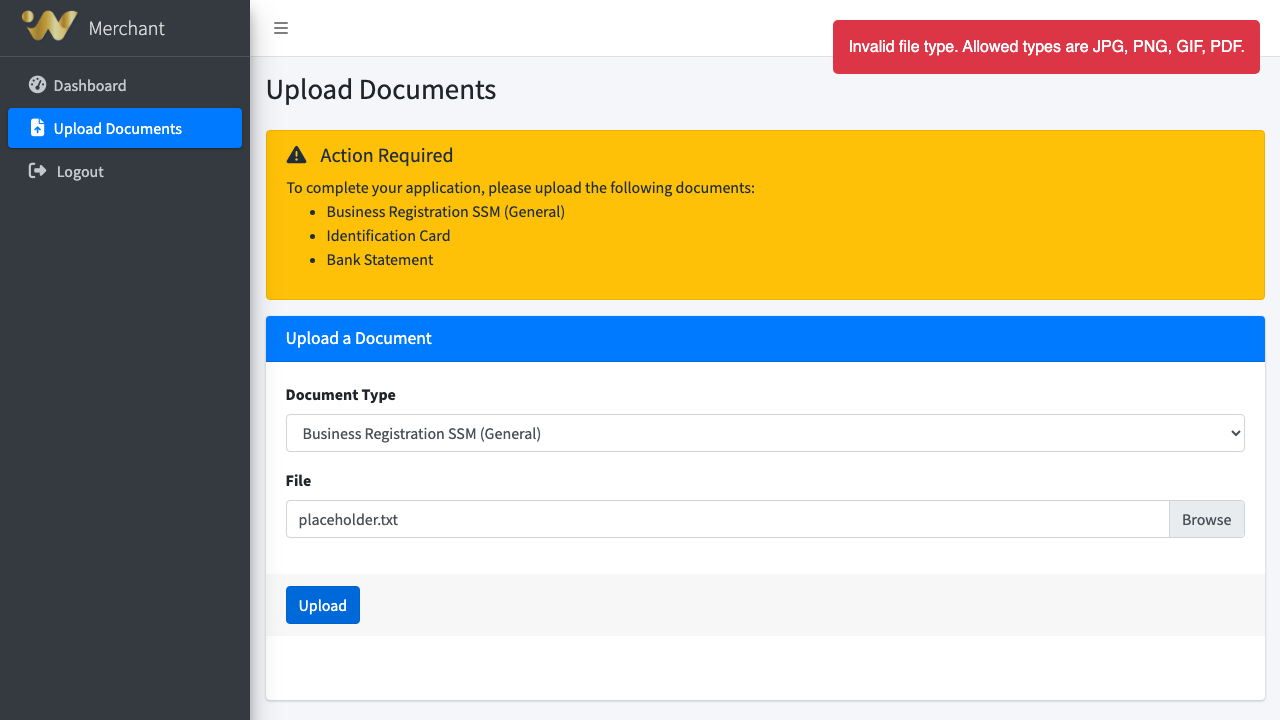
- Select the correct document file (e.g., a PDF or image file). The name of the file will appear in the form.
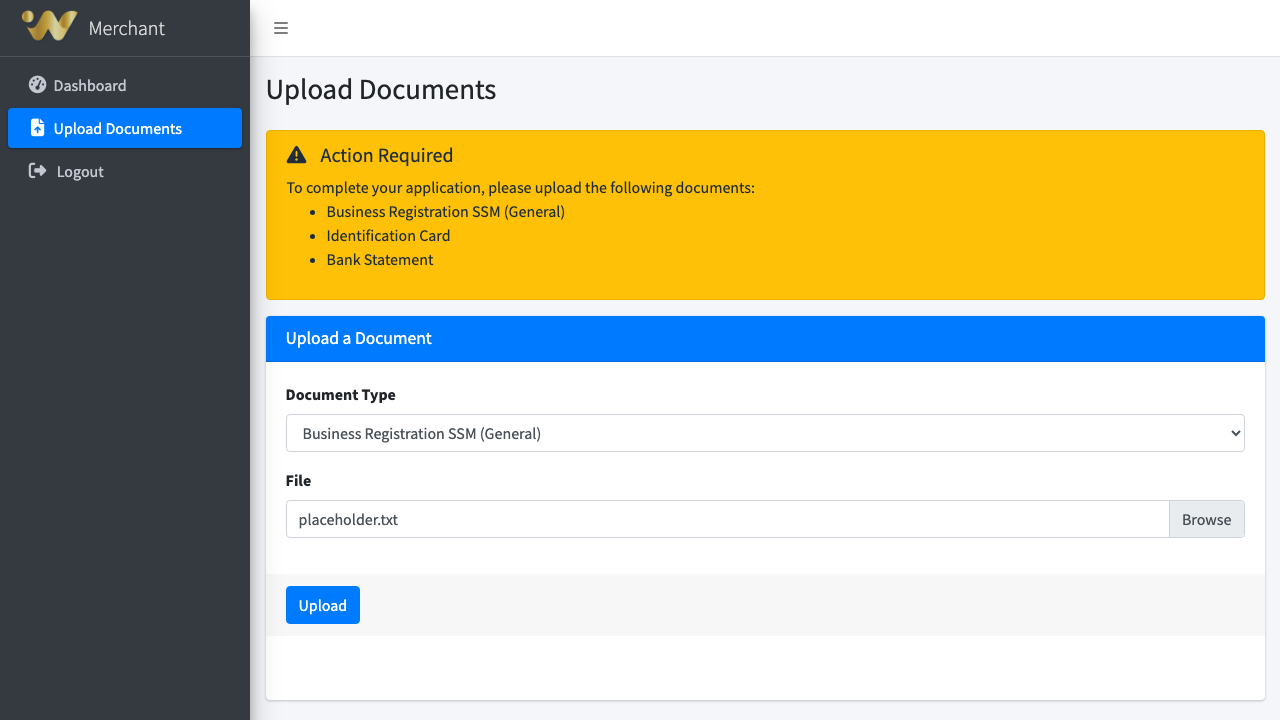
- Upload the File: Click the "Upload" button.
After uploading:
- Once the upload is successful, the page will refresh.
- The document you just uploaded will now appear in the "Uploaded Documents" table, with a status of "pending_verification".
- The "Document Type" dropdown will update, removing the type you just uploaded.
- Repeat this process until you have uploaded all the documents listed in the alert box. Once all required documents are uploaded, the alert will show a success message, and your application will be ready for final review by the WeShop team.
Managing Your Merchant Account
Once your merchant account is approved, you can start managing your online store. This includes adding products, creating discounts, and customizing the look of your shop page.
How to Manage Your Products
This section explains how to add, edit, and manage the products you sell on WeShop.
Viewing Your Products
- Navigate to the Products Page: In your merchant dashboard, click on "Products" in the sidebar menu.
- View Your Product List: This page shows a table of all your products, including their image, name, category, and status (active or inactive).
Adding a Simple Product
For merchants who need to add a product quickly without complex variations, WeShop offers a streamlined creation process. This is perfect for items that do not have different sizes, colors, or other options.
- Go to the Product Form: From the main "Products" page, click the "Add New Product" button.
- Enter the Product Name and Category: In the "Basic Information" section, fill in the Product Name and select a Category. These are the minimum required fields.
- Save the Product: Scroll to the bottom of the page and click the "Save Product" button.
The system will automatically create a standard version of your product with a unique SKU, a default price of 0, and a default quantity of 0. You can then edit the product later to add more details.
Adding a New Product (with Variations)
- Go to the Product Form: From the main "Products" page, click the "Add New Product" button.
- Fill in Basic Information:
- Product Name: The name of your product as customers will see it.
- Description: A detailed description of the product.
- Brand: The brand of the product.
- Category/Subcategory: Select the most appropriate category and subcategory for your item.
- Status: Set the product to "Active" to make it visible in your shop, or "Inactive" to hide it.
- Upload Images: In the "Images" section, click "Choose file" to select one or more images for your product from your computer.
- Add Variations (e.g., Size, Color):
- In the "Variations" section, click the "Add Variation" button.
- Enter a Variation Name (e.g., "Color").
- In the small box that appears, type an option (e.g., "Red") and press the Enter key. Add as many options as you need (e.g., "Green", "Blue").
- You can add multiple variations (e.g., one for "Color" and another for "Size").
- Manage SKUs and Pricing:
- Based on the variations you create, a table of all possible combinations will appear in the "SKUs & Pricing" section (e.g., Red / Small, Blue / Large).
- For each combination, you must fill in:
- SKU: A unique code for you to track the item (e.g., `TSHIRT-RED-S`).
- Price: The price for this specific variant.
- Quantity: How many of this variant you have in stock.
- Save the Product: Click the "Save Product" button at the bottom of the page.
How to Manage Your Discounts
- Navigate to the Discounts Page: In your merchant dashboard, click on "Discounts" in the sidebar menu. This page shows a list of all the discounts you have created.
- Add a New Discount:
- Click the "Add New Discount" button.
- Fill in the discount details:
- Discount Name: A name for your reference (e.g., "Holiday Sale").
- Discount Type: Choose "Percentage" (e.g., 10%) or "Fixed Amount" (e.g., RM 5.00 off).
- Value: The amount of the discount.
- Start/End Date: The period during which the discount is active.
- Status: Set to "Active" or "Inactive".
- Click "Save Discount".
- Applying Discounts to Products: After creating a discount, you must apply it to your products.
- Go to the Products page and Edit the product you want to discount.
- In the "Discounts" section of the product form, you can select the discount you created to apply it to the entire product or to specific variations (SKUs).
How to Customize Your Shop Page
- Navigate to Shop Management: In your merchant dashboard, click on "Shop Management" in the sidebar menu.
- Update Shop Details:
- Brand Name: The name of your shop.
- Description: A short description of what you sell.
- Shop Banner: Upload a large banner image that will appear at the top of your shop page.
- Click "Save Shop Details".
- Manage Your Gallery:
- Upload several images to create a photo gallery for your shop.
- You can drag and drop the images to change their display order. Click "Save Image Order" when you are done.
- Set Featured Products:
- In the "Featured Products" section, use the search bar to find products you have already added.
- Click on a product from the search results to add it to your featured list.
- You can drag and drop the featured products to change the order in which they appear on your shop page. Click "Save Product Order" to save the changes.
- Live Preview: Click the "Live Preview" button at the top of the page to see what your shop page looks like to customers.